Android Proxy Guide: How to Configure a Proxy Server on Android
Posts by Colin TanJune 12, 2023
Most of the time, when we talk about using proxies, we tend to focus on computers, with almost nothing to be said about mobile devices.
However, as more and more people get smartphones and use them to access the Internet, devices like Android and iOS become more relevant when it comes to using proxies.
With the rise of mobile traffic, it is smart to think about how to set up proxies on your smartphone. This article in particular is focused on proxies that can be used with Android mobile devices.
When talking about configuring Android so that you can make the most of a proxy server, there are a few ways that it can be done.
We’re going to look at the three main ways, which includes configuring proxies for mobile data, configuring Android smartphones when using Wi-Fi, and using proxy setting apps.
Let’s get into it.
How to Configure Android to Use a Proxy for Mobile Data
Not too many people are aware that there is a provision for configuring an Android device to use proxies as a default.
This is perhaps because most smartphones these days come with Internet settings already, which means that you don’t need to dig deep to use a proxy.
If you want to configure your Android so that you can access the Internet via a proxy server, follow the steps that we have set out below. Keep in mind that this is only going to work for mobile data, not Wi-Fi.
- Find ‘settings’ on your Android smartphone

- Select ‘network and internet’
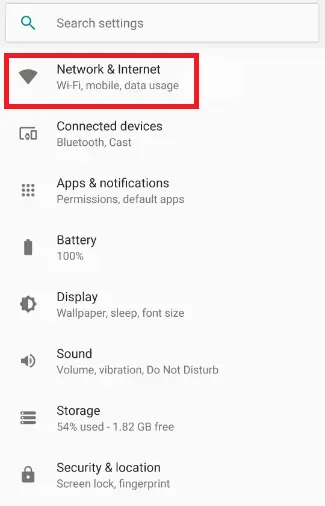
- Select ‘mobile network’
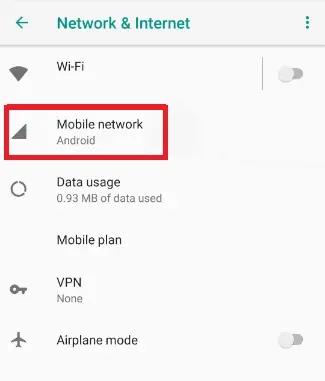
- Select ‘advanced’ and then ‘access point names’, or ‘APN’

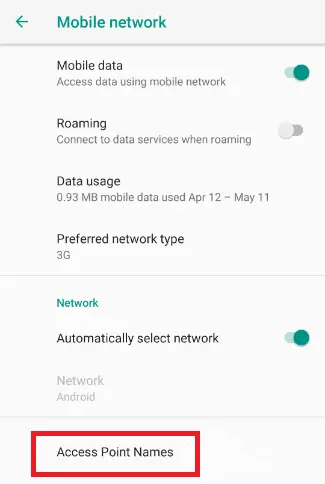
- You will see a list of all the APNs being provided. Select the one that you currently use
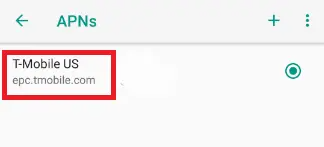
- View the configuration options, including ‘port’, ‘proxy’, ‘password’ and ‘username’
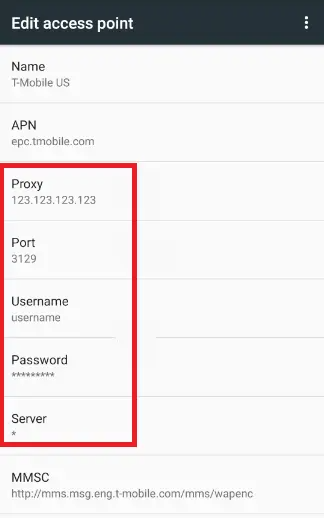
- Complete these areas with details of your proxy.
- If you plan on using IP authentication, you do not need to worry about including your new username and password here. You only need to make sure that your Android device is whitelisted for the right IP address from your proxy’s dashboard.
- After entering the right details, select ‘save’, and then turn your mobile data off and then on again.
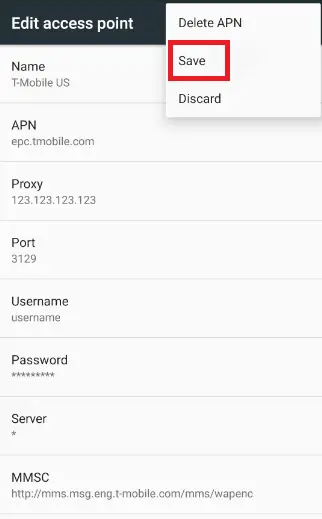
- From now on, all of your Internet traffic will be sent through the proxy server that you have set up with your Android smartphone.
How to Connect Proxies for Android When You Use Wi-Fi
There is something a little bit technical about using proxies for Android. When you configure your Android device so that you can use proxies just like we have discussed above, it is only going to work for mobile data, and just for your particular APN.
This means that most Wi-Fi networks located in workplaces and schools are notorious for controlling sites that you want to visit using the network. In order to avoid this, you will need to use a proxy.
Check out the steps below to figure out how to configure your smartphone to use proxies when you connect to a specific Wi-Fi network.
- Go to settings and select ‘network and internet’
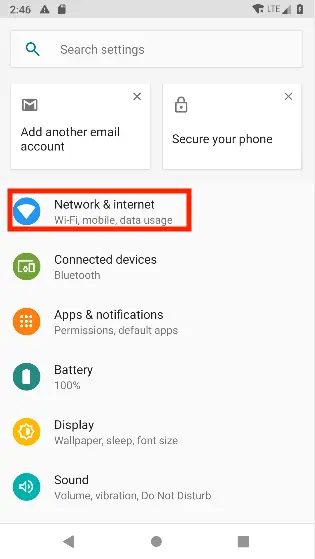
- You will see a few options. Select ‘Wi-Fi’
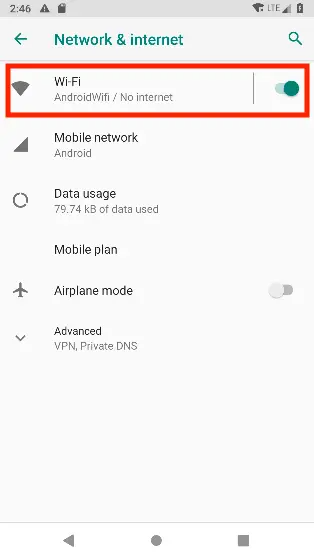
- Find the right Wi-Fi network
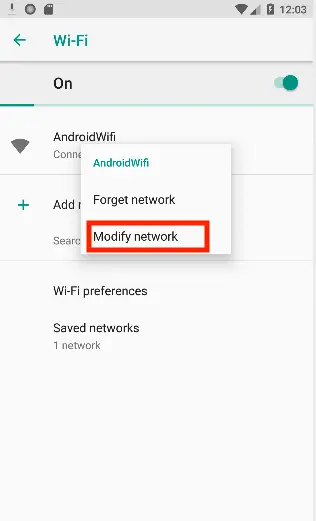
- Select and hold the right Wi-Fi network, and an interface will appear. Select ‘modify network’
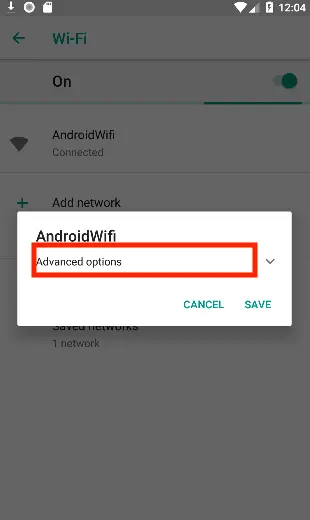
- Select ‘advanced’ and click ‘manual’
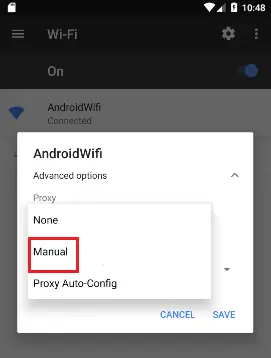
- Here, you will see the area where you can include the proxy details, including the port, host name, username, and password
- after you have entered all of the right information, select ‘save’

Using Proxy Setting Apps for Android
The two steps that we have talked about above are both default ways of configuring proxies on Android devices. This means that not everybody is going to want to go through this process.
Some will even get lost, because their particular device is slightly different from the one that we have used in this tutorial. If you are finding the instructions above a bit complicated, you can download proxy setting apps including ProxyDroid to use.
Before you do this, just make sure that you get your phone rooted.
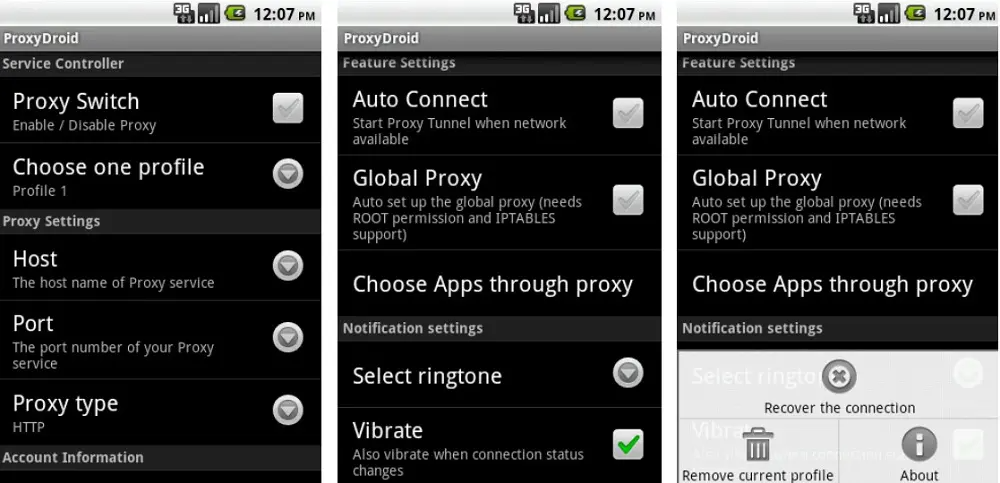
As we have discussed, the instructions that we have laid out above are common practice. However, there is one method that is not as common. This particular process involves individual devices where you use a proxy together with an app.
The proxy setting is done through the app, which means that it only affects that particular app and not others that you might have on your smartphone.
How to Confirm IP Address
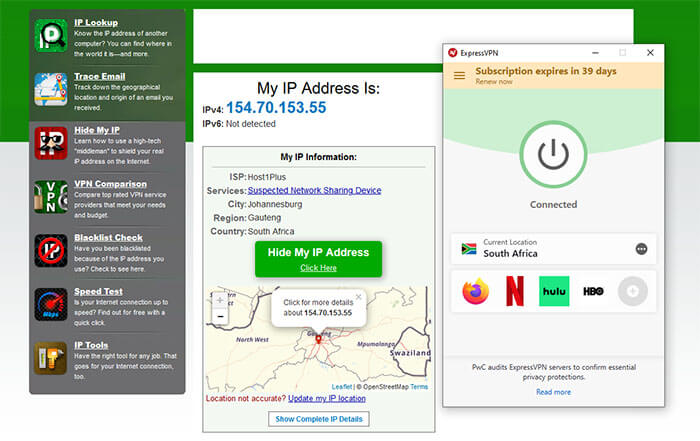
Now that you have configured proxies on your Android device, you need to make sure that it works.
- Go to ‘WhatIsMyIPAddress’ to check your real IP address before you set the proxies.
- Configure your proxies using any of the methods that we have talked about above.
- Go back to ‘WhatIsMyIPAddress’ and check the IP address that they show you. If it is the same as your proxy’s IP address, then it is working.
- If it isn’t though, the configuration hasn’t worked, or your browser is ignoring it.
One More Thing About Proxy Settings on Android
One thing to know about using proxies with Android is that Android takes their security very seriously. As a result, some apps might not work with the proxies that you’ve got set up.
If an app doesn’t seem to be working, then there is no way that you can force it to use your particular proxies, except of course if you go to the trouble of getting your phone rooted. However, in general, this is frowned upon unless you really know what you are doing.
If you have figured out that your apps are not configuring well with your proxies, then you might want to consider using a VPN service instead. However, if the proxies are working, then we suggest that you check out SSLPrivateProxy, or High Proxies.
Final Thoughts
While you might have never thought of using a proxy server with your Android before, it is definitely one of the best ways to anonymously use the Internet through Wi-Fi or your mobile data.
Applying one of the three approaches that we’ve talked about above will allow you to configure your Android proxy settings and keep your IP address safe from hackers out there so that you can avoid being blocked and monitored online. Good luck!
